Low amperage charging as noted above is an excellent first step. I use adjustable chargers that let me dial current waaay down. I set the charge current to match the downtime I expect the bike to have. So at work I may set it to as low as 0.20 amps, which is VERY low, but I don't need the bike for another 8 hours and then, since I know how much juice i need to get home, I don't want to go over an 80% charge. The low current level makes it that much safer in terms of potential max charge value should I calculate charge time/current wrong.
Speaking of that calculation, do this once or twice and you'll know how long to charge for: Before you plug in your charger, take a reading on the voltage level. Lets say the battery is 47.5v. Plug in and set a timer for one hour. Come back after that hour, and unplug the charger. What is your battery level now? If it is lets say 49v then you now know that one hour of charging gives you 1.5v of added current to your battery. A more involved but more precise way to do this is as follows:
1. Let the bike sit 30 minutes so the battery level is stable after your ride
2. Plug charger in and take voltage reading (the charger will be bumping up the reading but thats OK)
3. Come back in an hour and read battery voltage.
4. Come back after one more hour and get another reading
5. Do it a third time. Now average your three values. Use that as your expected hourly voltage gain
Next: go to Amazon and spend $10 on a mechanical countdown timer.
Here's a link to the one I use. Now that you know how many volts you will gain in an hour (or a half hour if you do a little math), set the countdown timer to charge only for the time you need to get to your target voltage (80%, 90% etc.). When the timer runs out, power is physically cut and thats an added safety factor. It is also a way to do an 80% charge with a charger that has no adjustability.
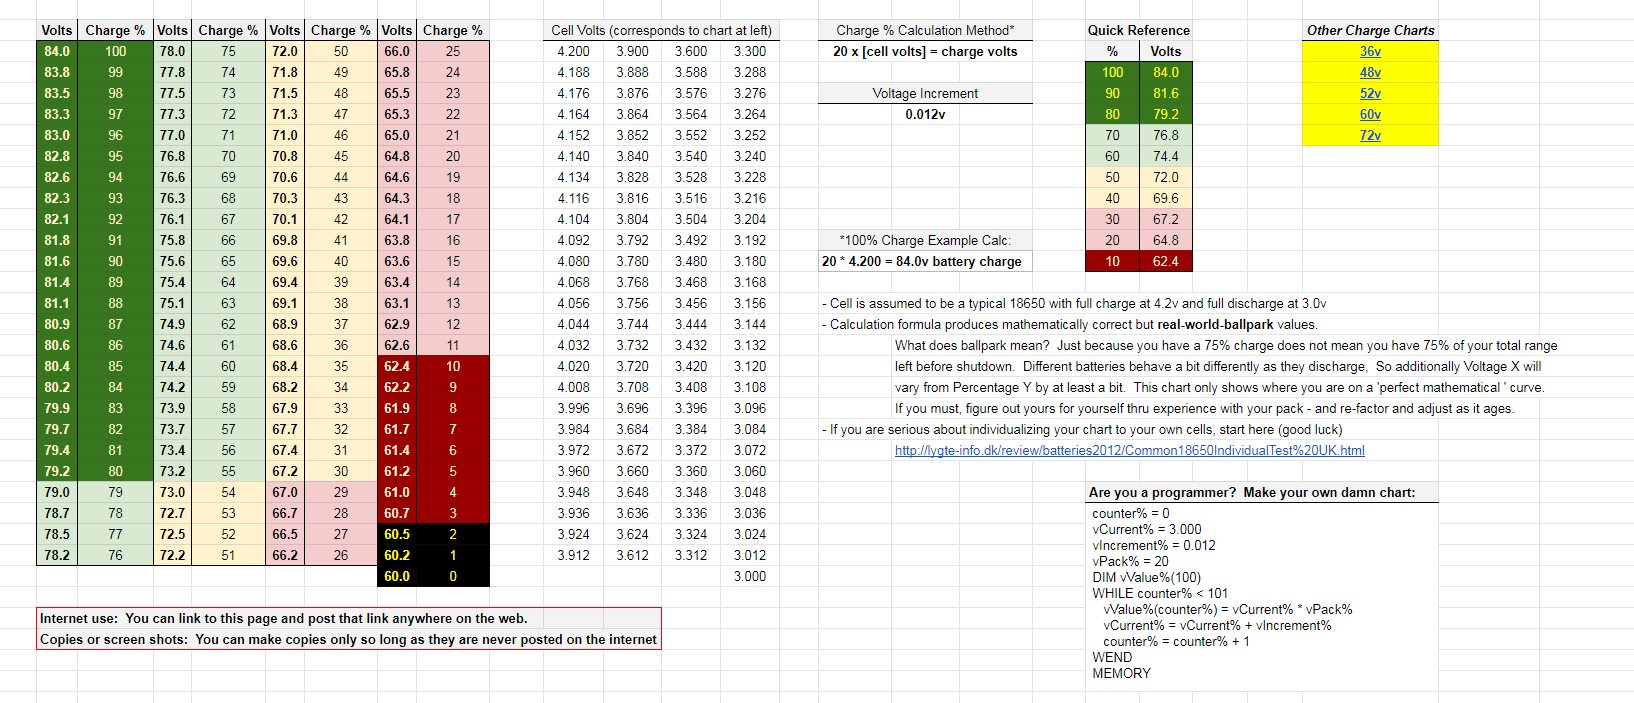
Here are voltage charts so you can figure out what the percentages are for various voltages:
Whats an 80% charge on a 48v battery? These charts give answers to questions like this on common ebike battery voltages: 36v, 48v, 52v, 60v and 72v.

talesontwowheels.com
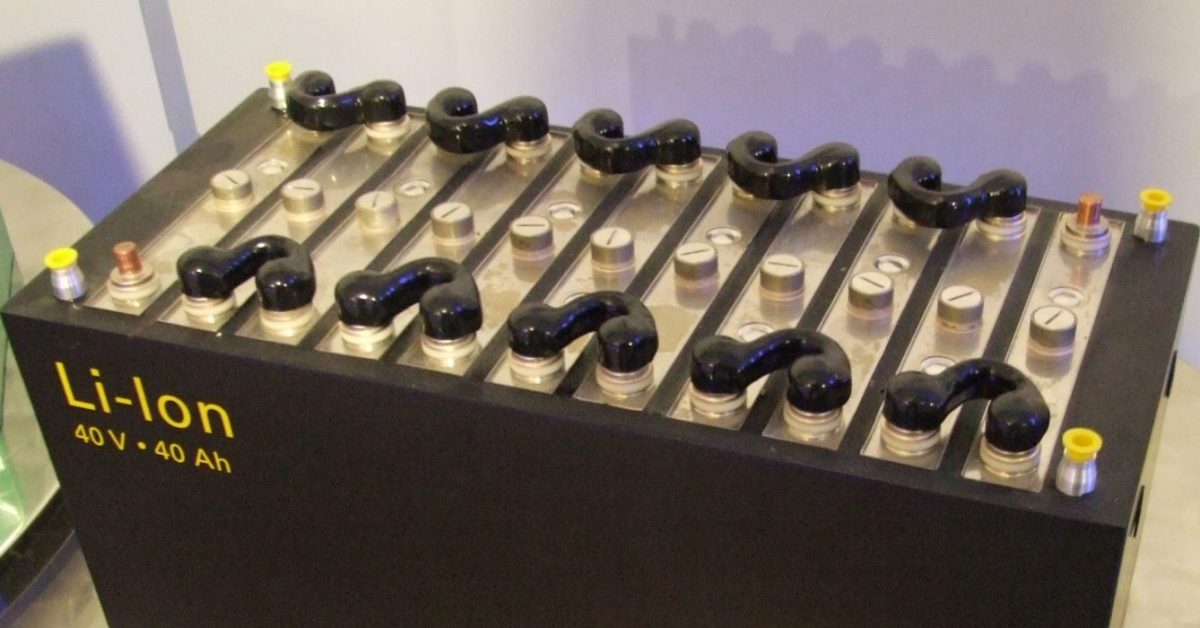
As for best practices while charging, which is what you really asked about in the first place, on your typical 18650/21700 Li-NMC cell, the 80/20 rule is pretty good. Fully draining the pack is generally a bad thing. Depth of discharge is every bit as bad for a pack as is fully charging it to 100% and letting the pack sit overnight like that. The thing is, most battery how-to blog posters know its tough enough to convince people to only use 80% of their battery capacity, so telling them draining the thing dry is also bad is a bridge too far for the layman to accept.
Here are some references for you.
BU meta description needed...

batteryuniversity.com
This is an easier read:
Lithium-ion batteries are expensive, and large battery packs such as those in everything from electric cars to electric motorcycles and...

electrek.co
This is a tough read. Maybe skip to the conclusions at the end, but it goes directly to what
@sammy said above. Its an old article but still very relevant.
We have written in the past about tips that will help your expensive lithium battery pack last as long as possible. This article will cover some additional information about what happens inside the…
www.electricbike.com
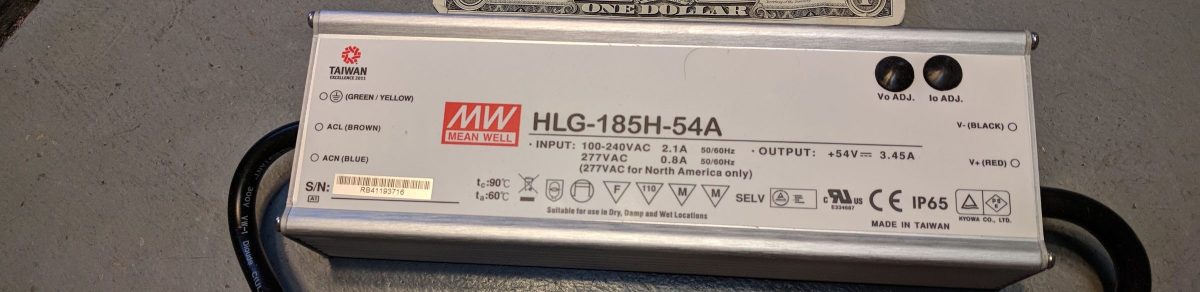
And lastly, if you don't have an adjustable charger, or even a real time battery voltage indicator, here's an easy way to get one without breaking the bank buying a $300+ Cycle Satiator. I use these as onboard weatherproof chargers on some of my bikes. These units are fanless (no moving parts to fail), meant for commercial outdoor signs or municipal street lights and have incredible lifetime ratings in the 200,000-hour MTBF range.
How about a charger – quickly adjustable for voltage and current – that is rated for hundreds of thousands of hours of use before it typically fails?
talesontwowheels.com
EDIT: Oh and there's this, which is largely anecdotal but comes from a long-time ebike vendor:
For a new battery, do not drain the sucker down. However, DO charge it to 100% for up to the first six charge cycles. When you do that, let it sit on the charger for a few hours after it reaches 100% charge. The reason for this is to let the BMS balance the cells in the pack. Once you have done this, go to an 80% charge regimen. Its not a bad idea to periodically do a 100% 'balance charge' on occasion in the future. For a daily-driven bike, once a month should be plenty.